- Jul 6, 2021
- --
Tips for Writing Antora Macros
Our documentation team recently migrated to a code-based documentation that gets rendered into a static website. We chose to work with Antora and AsciiDoc and developed two macros to extend Antora’s functionality, improving our documentation even further. In this blog, we would like to share our experience writing Antora macros.
-
 Maxime MichelSite Reliability Engineer, Magnolia

Experience Magnolia in action
Experience Magnolia's key features firsthand in an interactive product tour.
Take a tour nowSelection and migration
After a few years of deliberation on migrating to a docs-as-code setup, the team ran a proof of concept and narrowed down the options to Docusaurus, a Markdown static site generator, and Antora, which uses AsciiDoc as the markup language.
Antora and AsciiDoc won because of their native features, such as include directives and the ability to fetch content from multiple Git repositories. The decision was also influenced by our aim to work closely with our developers. We wanted to align the documentation to their typical workflow to encourage them to contribute to our technical content.
To make a long story short, the migration involved these steps:
Converting the back-end content into Markdown and then converting the Markdown into AsciiDoc using pandoc
Setting up the initial Antora structure for our documentation site
- keeping it as similar as possible to our old site for ease of transition
Setting up Algolia to crawl and index our site for search
Customizing the Antora UI to match our company palette
Writing Antora macros
Why write a macro?
Though Antora provides a substantial amount of functionality for our technical writers and developers out of the box, we wanted to create extensions to improve our documentation even further. The Antora macros have come in useful and we'll look at two simple examples here.
The challenge with using a static site is dynamic content. In Magnolia's case, modules have different release cycles and it wouldn't be worth to manually track individual module versions. In addition, it would be prone to errors. Instead, we wanted to automatically fetch and display this information to the user.
Another use case for macros is our Java documentation. The documentation links to Java documentation in multiple locations. A class's documentation depends, among other things, on the class’s module, as well as its version. The version changes over time and the class could be moved or renamed. We chose to create a macro to keep this information up-to-date automatically.
The above examples are simple, but I had to spend a lot of time researching how to get started. Despite getting great help, I almost gave up on the task, because this topic is not documented at all, which is why I want to explain it today! Let's dive into it.
Picking an extension type
The Asciidoctor.js documentation lists the following extension types:
Block Macro Processor
Inline Macro Processor
Block Processor
Include Processor
Preprocessor
Postprocessor
Treeprocessor
Docinfo Processor
We'll take a look at two, the inline macro processor and the postprocessor. I hope that these examples help you to implement any of the extensions.
Exploring Reusable Web Components
This blog explores the 3 main technologies of WebComponenets: HTML templates, shadow DOMs, and custom elements. To learn more, read the blog and check out our code on Git.
Read moreWriting an inline macro processor
My first success was getting an inline macro processor to work, thanks to an example I found in a Fedora documentation pull request.
This is what the complicated syntax is doing:
The package extension is registered
- parsing package:asciidoctor when encountered in the document.
The above line is rendered into a link
- i.e. https://apps.fedoraproject.org/packages/asciidoctor
- allowing the override of the root URL with the page property url-package-url-format at document level.
Luckily, I noticed that it was now possible to use an easier syntax.
To find out in which JAR a class is in, I implemented the javadoc macro, which queries Magnolia’s Nexus instance when a class is defined like this:
javadoc:info.magnolia.templating.functions.TemplatingFunctions
Using the Nexus response, I was able to assemble the link to the class’s Java documentation resulting in this macro structure:
 const request = require('sync-request')

function initInlineManMacro ({ file }) {
  return function () {
    this.process((parent, target, attrs) => {
      // …
    })
  }
}

function register (registry, context) {
  registry.inlineMacro('javadoc', initInlineManMacro(context))
}

module.exports.register = register
This script deliberately depends on sync-request, which might seem counterintuitive in modern, async JavaScript. But that’s because I've found experimentally that AsciiDoc renders the content and does not come back to it. Hence, for the response to be ready when the macro gets called, the request has to be blocking.
target evaluates to info.magnolia.templating.functions.TemplatingFunctions.
Let’s now implement the actual process method.
Because of our security requirements, the macro has to ensure that credentials are supplied. If they are not supplied, the macro assumes that we are in a development environment and generates a dummy link only:
 const attributes = Opal.hash2(['window'], { window: '_blank' })

if (!process.env.NEXUS_USERNAME || !process.env.NEXUS_PASSWORD) {
  console.log('Environment variables NEXUS_USERNAME and/or NEXUS_PASSWORD not present, not looking up Javadoc links.')
  return this.createInline(parent, 'anchor', shortenedClassName, { type: 'link', target: '#', attributes })
}
Let’s now send a request to Nexus:
 // blocking REST call to nexus
var res = request('GET', 'https://nexus.magnolia-cms.com/service/local/lucene/search', {
  qs: {
    cn: target
  },
  headers: {
    Accept: 'application/json', // force nexus to produce JSON rather than XML
    Authorization: 'Basic ' + Buffer.from(process.env.NEXUS_USERNAME + ':' + process.env.NEXUS_PASSWORD).toString('base64')
  }
})
We can now wrap it up by getting the correct values from the object we received and build the URL. I’ll spare you the details, but if you are interested, please take a look at the files at the end of this blog.
 console.log('Nexus search done for: ' + target)
// all results will return the same groupId, artifactId and latestRelease
// so we can just pick the first one
const nexusResult = JSON.parse(res.getBody('utf8')).data[0]

const groupId = nexusResult.groupId
const artifactId = nexusResult.artifactId
const version = nexusResult.latestRelease

let url = 'https://nexus.magnolia-cms.com'
…
url += '.html'

return this.createInline(parent, 'anchor', shortenedClassName, { type: 'link', target: url, attributes })
This is how the page looks:

And this is the HTML code:
This page only lists the most commonly used functions. See <a href="https://nexus.magnolia-cms.com/service/local/repositories/magnolia.public.releases/archive/info/magnolia/magnolia-templating/6.2.9/magnolia-templating-6.2.9-javadoc.jar/!/info/magnolia/templating/functions/TemplatingFunctions.html" target="_blank" rel="noopener">TemplatingFunctions</a> for the complete list.
We could have gone even further by adding a parameter to the macro, for example:
javadoc:info.magnolia.rest.ui.field.JsonMultiFieldDefinition[isEnterprise=true]
With this addition, attrs.isEnterprise could be evaluated in the processing code. If its value was positive, we could build the final URL using the magnolia.enterprise.releases repository rather than magnolia.public.releases.
Writing a postprocessor
Now that we are familiar with the basics, let’s build another macro. The flow will be different this time. Rather than converting code into HTML, we’ll hook into the AsciiDoc rendering process to add an attribute to the page.
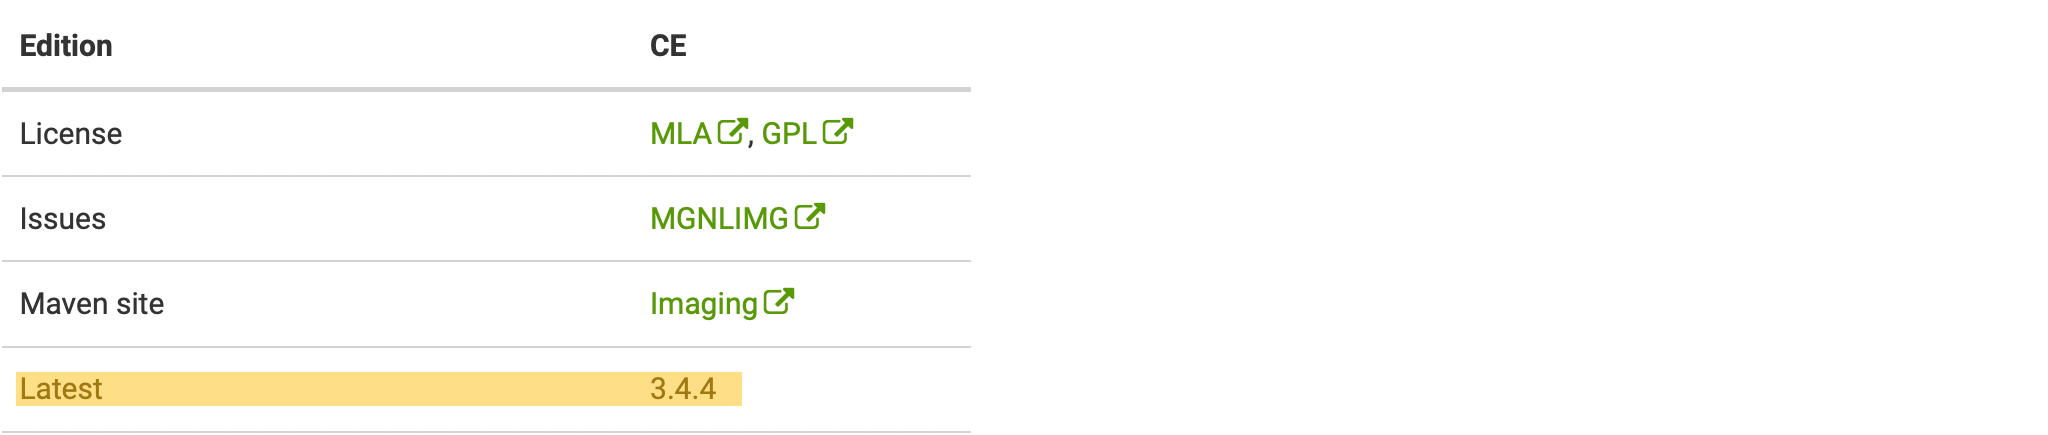
We want the macro to fetch the latest module version, when our technical writers declare the following Maven coordinates in an AsciiDoc document:
:group-id: info.magnolia.imaging
:artifact-id: magnolia-imaging
The macro shall query the Nexus and define the following variable:
:modules-version
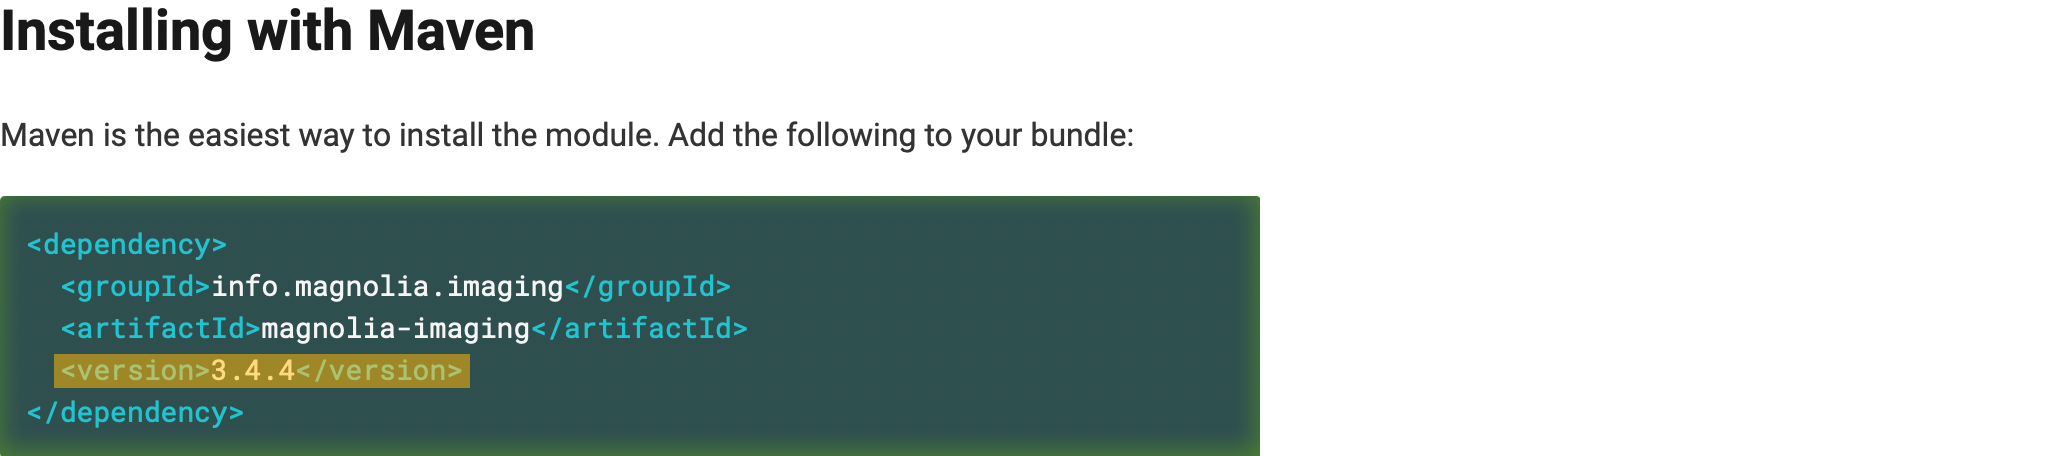
This variable can then be referenced in the document to display the latest module version.
To proceed, we have to choose the correct extension type. A preprocessor would update the content before AsciiDoc does anything with it. Instead, we need to read the page properties first. Therefore, we need a postprocessor that runs after the rendering process.
 const request = require('sync-request')

function moduleVersionPostprocessor () {
  this.process((doc, out) => {
  })
}

function register (registry) {
  registry.postprocessor(moduleVersionPostprocessor)
}

module.exports.register = register
The REST request implementation and credentials management are similar, but we’ll parse page attributes:
 if (doc.getAttribute('group-id') && doc.getAttribute('artifact-id')) {
  const groupId = doc.getAttribute('group-id')
  const artifactId = doc.getAttribute('artifact-id')
This is how we add the new page attribute:
 doc.setAttribute('modules-version', version)
console.log('The following version was defined as page attribute: ' + version)
Despite not modifying the page, we must return its content for the rendering pipeline to complete:
return out This is the final result of the macro:
The power of Antora macros
Neither of these macros was difficult to implement. The code is much simpler than the Java equivalent in our previous solution. This proves how powerful static sites are and that the migration is well worth the effort.
For more information, you can take a look at the entire files: