- Oct 20, 2020
- --
Creating Experiences with Augmented Reality on the Web
-
 Christopher ZimmermannPrincipal Product Manager, Magnolia


Experience Magnolia in action
Experience Magnolia's key features firsthand in an interactive product tour.
Take a tour nowAugmented Reality (AR) has broken into the mainstream through that mini computer in everyone's pocket, the phone. The ‘Killer App’ for AR is an incredibly life-like preview. When you shop for a product, you want to see exactly how it looks, and how big it really is. AR can provide an even better view of a product than seeing it in store, because you can place the product in your own home. You can really try it out. Instantly.

But other than that, it’s just fun. It's a delight to see a new thing sitting on your table in your living room, that is not actually there. And it's a delight to show it to friends, coworkers and clients too. Like Arthur C. Clark famously said "Any sufficiently advanced technology is indistinguishable from magic." So who's the magician? You are, my web technology coding friend!
First - try out an example by scanning this QR code with your phone camera:

The example displays an interactive 3D model of a treasure chest in the browser of any device. On AR-capable devices you can see an indicator icon to launch AR. When you click on it the device’s native AR system takes over and asks you to scan your surroundings. You can then place the 3D model of the treasure chest right in front of you.
The code
The great thing about this trick is how easy it is to pull off. This is due to the top-notch device and browser support by Apple and Google; and the awesome model-viewer script from Google.
The embedded HTML code is really easy:
 <model-viewer
    poster="3dmodles/chest.png"
    src="3dmodels/chest.glb"
    ios-src="3dmodels/chest.usdz"
    alt="Chest"
    shadow-intensity="1"
    camera-controls
    ar ar-modes="webxr scene-viewer quick-look" ar-scale="auto"
    quick-look-browsers="safari chrome"
    auto-rotate
>
</model-viewer>
The browser takes care of the rest.
The below file contains the full source code including the needed scripts:
The 3D models
The harder part is the 3D model. Android only supports the .gltf and .glb file formats, whereas Apple only supports .usdz format. It's the same story as video on the web a few years ago where you always had to provide multiple versions of a video since not all browsers supported the same format.
However it's just an annoyance and easy to work around for now. There are paid services and tools to convert 3D models between formats.
Tip: Sketchfab is a great place to find free and paid models - and all models can be downloaded in both of the required formats!
However, Sketchfab will give you a folder with a bunch of files for the .gltf, which can be impractical to work with. You can package these up into a single .glb file, for example with the glb-packer tool.
Integrate AR with a CMS
If you have a flexible CMS like Magnolia, you can one up your own magic trick by enabling your content authors and other non-technical users to add AR features to their web sites and mobile apps.
Magnolia and some other CMSs provide a visual "Page Builder" which lets authors drop any components on a page. I'm going to show how you can do this in Magnolia, but the same principles apply to other flexible CMSs.
AR content type
Let's follow the best practice right from the start. What if an author wants to place an AR couch on many pages, not just one? They don't want to reconfigure it everywhere. This is a classic case of content re-use.
So we'll create a new content type for AR models in Magnolia. Authors can then create their "funky couch" in the AR content app and use it everywhere.
We'll treat the 3D models themselves as assets, just like images, videos, pdfs or other binary formats. The author just needs to upload or reference three assets in the AR content app: a .glb file for Android, a .usdz file for Apple, and an image file to act as a fallback in browsers or other channels that do not support 3D rendering.
You can find the full source code on GitHub, but let's look at the key parts.
This is the content type definition:
3d-models.yaml
 datasource:
  workspace: 3d-models
  autoCreate: true

model:
  nodeType: 3d-model
  properties:
    - name: image
      type: asset
      label: Image
    - name: glb
      type: asset
      label: GLB file
    - name: usdz
      type: asset
      label: USDZ file
It's simple to create an app for that content type:
3d-models-app.yaml
 !content-type:3d-models
name: 3d-models-app
label: 3D Models
With this app authors can already create AR models.

AR component
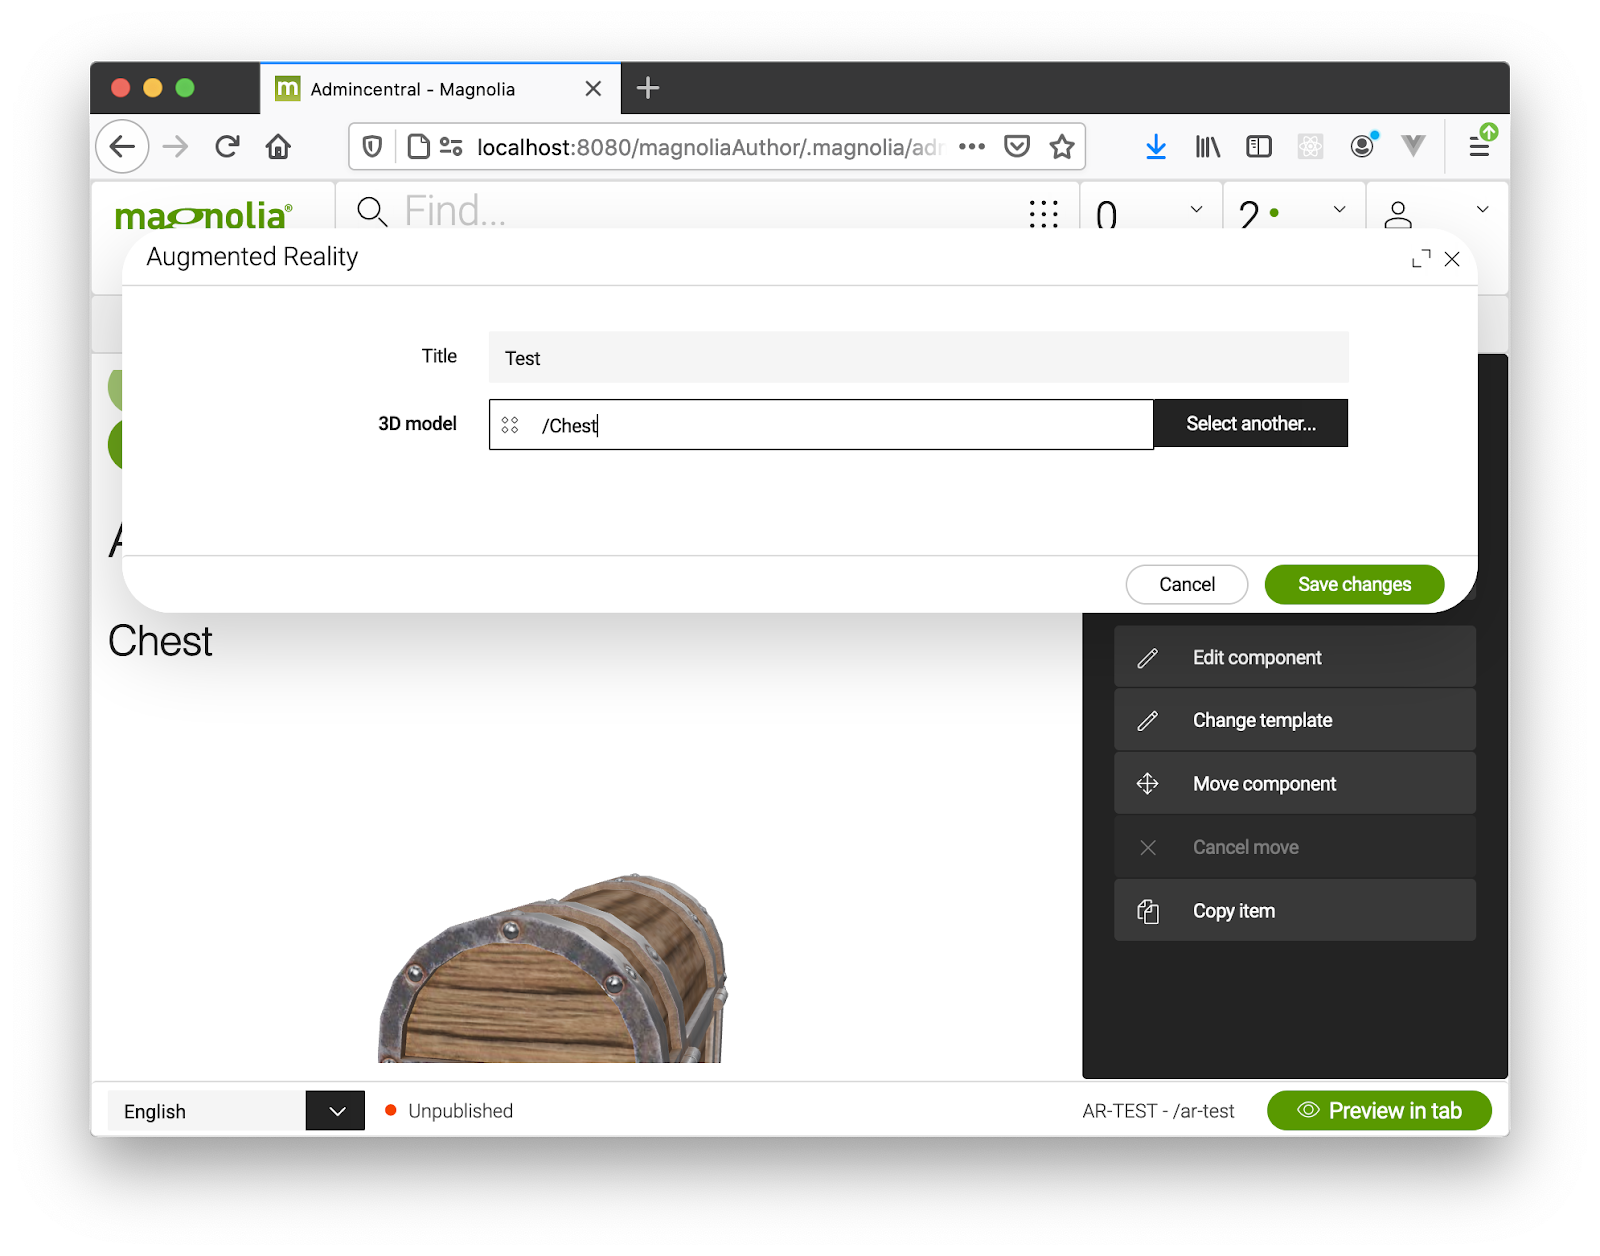
Now we'll create a component to allow the author to place AR content items within their experiences.
The component has a dialog where the author can choose the item.
augmentedReality.yaml
 label: Augmented Reality
form:
  properties:

    title:
      label: Title
      $type: textField

    ARmodel:
      label: 3D model
      $type: linkField
      chooser:
        workbenchChooser:
          appName: "3d-models-app"
This is the template script to render the necessary HTML dynamically:
augmentedReality.ftl (excerpt)
 [#if content.ARmodel?has_content]

    [#assign ARmodel = cmsfn.contentById(content.ARmodel, "3d-models")]
    [#assign image = (ARmodel.image??)?then(damfn.getAssetLink(ARmodel.image),'')]
    [#assign glb = (ARmodel.glb??)?then(damfn.getAssetLink(ARmodel.glb),'')]
    [#assign usdz = (ARmodel.usdz??)?then(damfn.getAssetLink(ARmodel.usdz),'')]

  <h2>${ARmodel.jcrName}</h2>

  <model-viewer
    [#if glb?has_content] src="${glb}" [/#if]
    [#if usdz?has_content] ios-src="${usdz}" [/#if]
    [#if image?has_content] poster="${image}" [/#if]

    alt="${ARmodel.jcrName}"
    ar ar-modes="webxr scene-viewer quick-look" ar-scale="auto"
    quick-look-browsers="safari chrome"
    auto-rotate camera-controls
    shadow-intensity="1"
>
</model-viewer>

 [/#if]
Magic
That's it. Now an author can upload and place AR content anywhere they like - without any coding. You can start a magic school.
Give it a shot!
New to Magnolia? Download and install the free community edition of Magnolia as described in the docs.
Then download this complete 'light module' from github and place it in the "light-modules" directory:
Presto.