-
 Chris JenningsSenior Solution Architect, Magnolia

Integrating a third-party JavaScript UI in Magnolia
In his article “Creating Custom Dialog Fields with JavaScript”, Bartosz Staryga showed how to create custom dialog fields of type javascriptField through simple YAML configuration. This article builds on his work and shows how to integrate a third-party user interface into the Magnolia UI using the JavaScript Dialog Fields module.
HTML vs. Markdown
I was recently involved in a discussion around replacing Magnolia’s rich text editor, which is based on CKEditor 4, storing user input as HTML. Magnolia returns this HTML via the REST API response when describing a content item that contains a rich text field.
The question was if it were possible for the API response to contain Markdown rather than HTML, for example:
HTML
description:”<h1>Turbo Encabulator</h1><p>New for 2023</p><p>Features<ul><li>Prefabulated aluminite base-plate</li><li>Lotus-o-delta main winding</li></ul>”
Markdown
description:”# Turbo Encabulator\nNew for 2023\nFeatures\n* Prefabulated aluminite base-plate\n* Lotus-o-delta main winding”
We can immediately see that the Markdown response is smaller: 124 vs. 156 characters, a 20% saving in bandwidth. To consume Markdown, a client has a much simpler task of parsing the reduced feature set than a client that must parse an HTML response.
As Magnolia does not provide a Markdown editor out-of-the-box, we set about finding a suitable editor that we could integrate into the Magnolia UI instead of CKEditor.
The Markdown editor
I quickly found SimpleMDE, a free, open-source editor, offering a WYSIWYG editor with an instant preview mode. It looked like a good fit to work alongside Magnolia’s own WYSIWYG editor, and would not require editors to learn Markdown.
Step 1: creating a content app that uses SimpleMDE
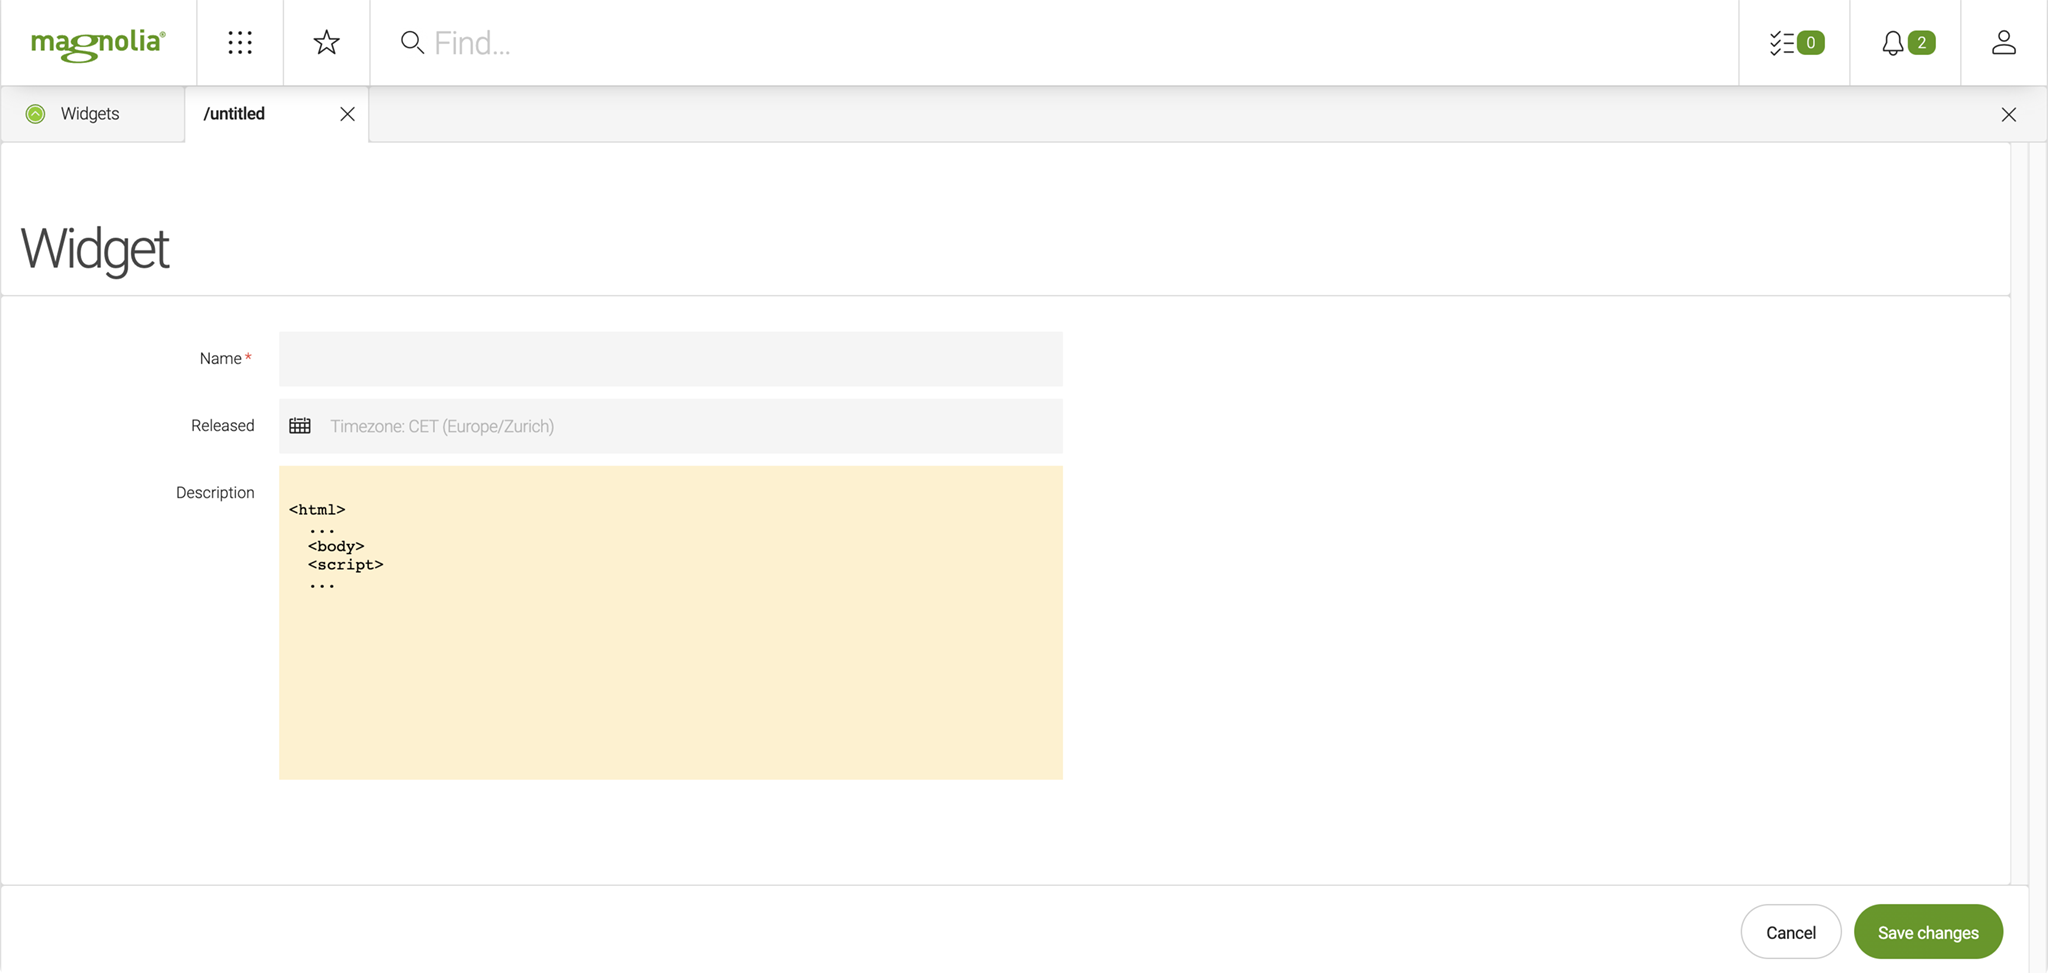
As the first step, I created a basic framework to test the UI, containing a Content App for a new Content Type, that I called ‘Widget’, and a field in the editor subapp.
The field definition uses the field type javascriptField, provided by the JavaScript Dialog Fields module. It is configured by referencing an HTML file that is loaded in the Magnolia UI using an iframe:
  subApps:
  detail:
    label: Widget
    form:
      implementationClass: info.magnolia.ui.javascript.form.FormViewWithChangeListener
      properties:
        description:
          $type: javascriptField
          fieldScript: /simplemde-poc/webresources/markdownField/index.html
          height: 400
The HTML file follows an example provided with SimpleMDE that attaches the Markdown editor to an HTML text area:
  <!DOCTYPE html>
<html>
<head>
  <meta charset="utf-8" />
  <meta name="viewport" content="width=device-width, initial-scale=1, shrink-to-fit=no" />
</head>
<body>
<form>
  <textarea id="input"></textarea>
</form>
<link rel="stylesheet" href="https://maxcdn.bootstrapcdn.com/font-awesome/latest/css/font-awesome.min.css">
<link rel="stylesheet" href="https://cdn.jsdelivr.net/simplemde/latest/simplemde.min.css">
<script src="https://cdn.jsdelivr.net/simplemde/latest/simplemde.min.js"></script>
<script>
    let simplemde = new SimpleMDE({
        element: document.getElementById("input"),
        spellChecker: false
    });
</script>

</body>
</html>
At this point, we can open the Widget app and see the Markdown editor:
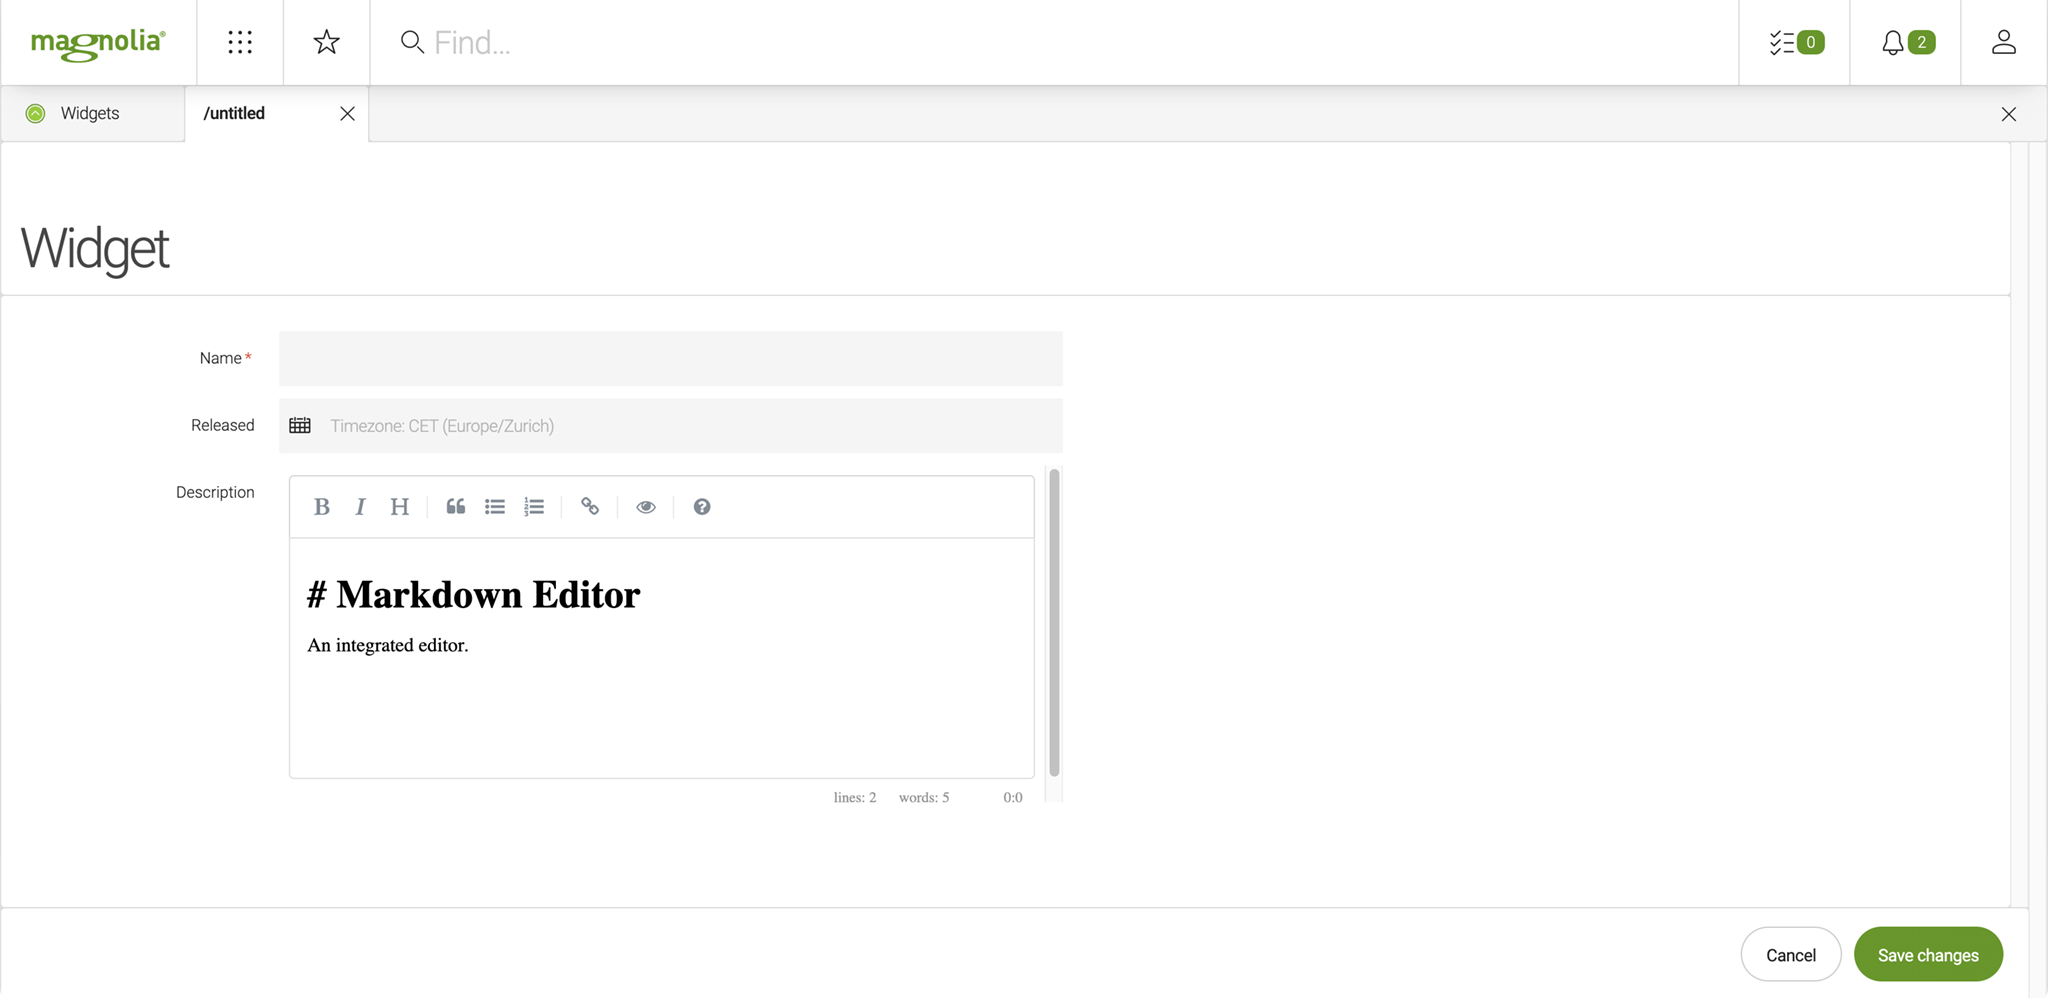
Because the SimpleMDE editor is inserted into the Magnolia UI using an iframe, we can inspect the page to find the URL and access it directly.
From color picker to complex REST wizards: Building custom dialog fields with JavaScript
Step 2: saving the editor’s input
We now have a functioning user interface with a Markdown editor. In step 2, we need to attach an event handler to the Markdown editor to persist the data in Magnolia.
The event handler sends any changes from the iframe to the parent window, the Magnolia UI. Fortunately, SimpleMDE already includes event handlers in the underlying CodeMirror framework.
We can add an event handler like this:
  simplemde.codemirror.on("change", function(){
  parent.window.postMessage({
    action: "changeValue", correlationId: correlationId,, value: simplemde.value()
  }, "*");
});
This event handler attaches to “change” events in the editor and posts them to the parent using the below parameters:
action: to notify Magnolia about any changes in the form
correlationId: the unique ID of the field that triggered the action
value: the field value as returned by SimpleMDE’s value() method
As you can see, we must use the correlation ID to add an event listener. We can obtain and save the ID from the event Magnolia sends when the field is initiated:
  let correlationId;
window.addEventListener('message', function (event) {
    if (event.data.action === 'init') {
      correlationId = event.data.correlationId;
    }
  }, false
);
Now we have a Markdown editor that passes its value to Magnolia for saving.
Step 3: loading saved values into the editor
In step 2, our data was saved in the JCR. In step 3, we update the function used on initialization to load data into the editor when content is opened for editing.
We have seen that Magnolia creates an event object in the iframe that provides the correlation ID. The event data also includes state information, such as its default or current value.
We can set the editor’s value by sending this data to the SimpleMDE API upon initialization:
  if (event.data.action === 'init') {
  correlationId = event.data.correlationId;
  simplemde.value(event.data.state.value || '');
}
The OR statement ensures that the editor is primed with an empty string if the property has been deliberately set to empty and Magnolia returns a null/undefined value.
Magnolia takes care of setting state.value using a default value that we can define in the configuration.
Step 4: SimpleMDE enhancements
We now have a fully functional editor that can save a value, load a value, and handle defaults. In optional step 4, we can customize the editor.
SimpleMDE exposes a lot of configuration, for example, hiding certain icons from the editor’s toolbar, much like CKEditor’s rich text field. This is achieved by adding the names of the hidden features to an array called hideIcons.
Magnolia allows us to set parameters that will be made available to our JavaScript via the event object. As we can only receive the event inside an event handler, we must move everything into the initialization block and configure the editor accordingly, for example:
  let hideIcons = [];
if(!event.data.state.parameters.images) {
    hideIcons.push("image");
}
if(!event.data.state.parameters.links) {
  hideIcons.push("link");
}
Integrating 3rd-party UIs in Magnolia in 3 simple steps
It was very easy to integrate this third-party user interface element into Magnolia’s editing UI.
From our initial idea and a suitable component, we wrote one fragment of JavaScript and prepared a configuration file that gave us loading and saving capabilities. We then exposed the element’s own configuration for easy customization.
If you want to use this code, you can find all files in my Git repo.
I hope you found this blog post useful, and I encourage you to share your own integrations here.